Ever since I can remember, my son has been climbing – furniture, trees, me. You name it, he’s tried to scale it. I just decided it was time to make it safe for him to do. And I wanted something indoors so we could practice climbing up and down and make it a social thing we did together.
Why You Should Consider Having a Rock Climbing Wall If Your Kid Has Special Needs:
Rock climbing is a physically demanding activity that requires concentration, motor planning and sequential thought, among other skills. Full inclusion to accommodate children who have physical limitations or cognitive and sensory processing deficits can be challenging. However, children with special needs can reap many benefits offered by this appealing activity. Whether a physical, cognitive, communication or sensory disability, there is a degree of participation that can be achieved. Some of the many benefits of rock climbing as they relate to certain disabilities are described below:
Sensory Disabilities
- As children climb, they are gaining exposure to movement and sensory input that can help in motor processing.
- Climbing gives children’s bodies proprioceptive input (being aware of body and movement in relation to its joints). The pressure they feel in their muscles and joints can help internal regulation.
- Climbing helps develop the vestibular system.
- Rock climbing is a very tactile activity.
- The climbing wall is visually inviting and may serve as a motivator for children to climb, encouraging increased movement.
Physical Disabilities
- Core strength and muscle tone are positively affected by climbing.
- Strength in hands, arms and legs can increase by climbing.
- Children who have physical limitations often participate in sedentary activities. Climbing, at whatever physical level possible, provides body movement that can increase circulation and assist in digestion.
- Range of motion activities can increase flexion and extension, which helps prevent muscle atrophy.
- Climbing helps children gain experience and confidence in bilateral movement and coordination.
- Eye-hand and eye-foot coordination is practiced.
Cognitive Disabilities
- Action concepts such as on/off, up/down, right/left, go/stop can all be incorporated into climbing. This helps children learn and understand these words because they are experiencing them verbally as well as kinesthetically.
- Problem solving is naturally incorporated into climbing as children determine hand and foot placement throughout the climb.
- Decision-making is involved as children will be faced with choosing a particular path and following through with their decisions.
- Facing the climbing wall and constantly scanning the wall for the next hold to reach for can help take away auxiliary distractions and increase attention. This also helps children think sequentially.
- Children are better able to focus and attend to cognitive tasks after they have been able to use their whole body in activity.
Communication Disabilities
- Receptive language can be targeted as children listen and process verbal direction by a teacher or another child, for example which color hand hold to reach for.
- Receptive language is further developed as children talk to each other while climbing so they know where they are in relation to others. This is especially important for children who have visual impairments.
- Climbing allows for independent movement. Children who have autism may not like physical contact and this is an activity that caters to that characteristic.
- Cross-curricular activities invite written communication; for example, by finding letters or spelling words on the climbing wall.
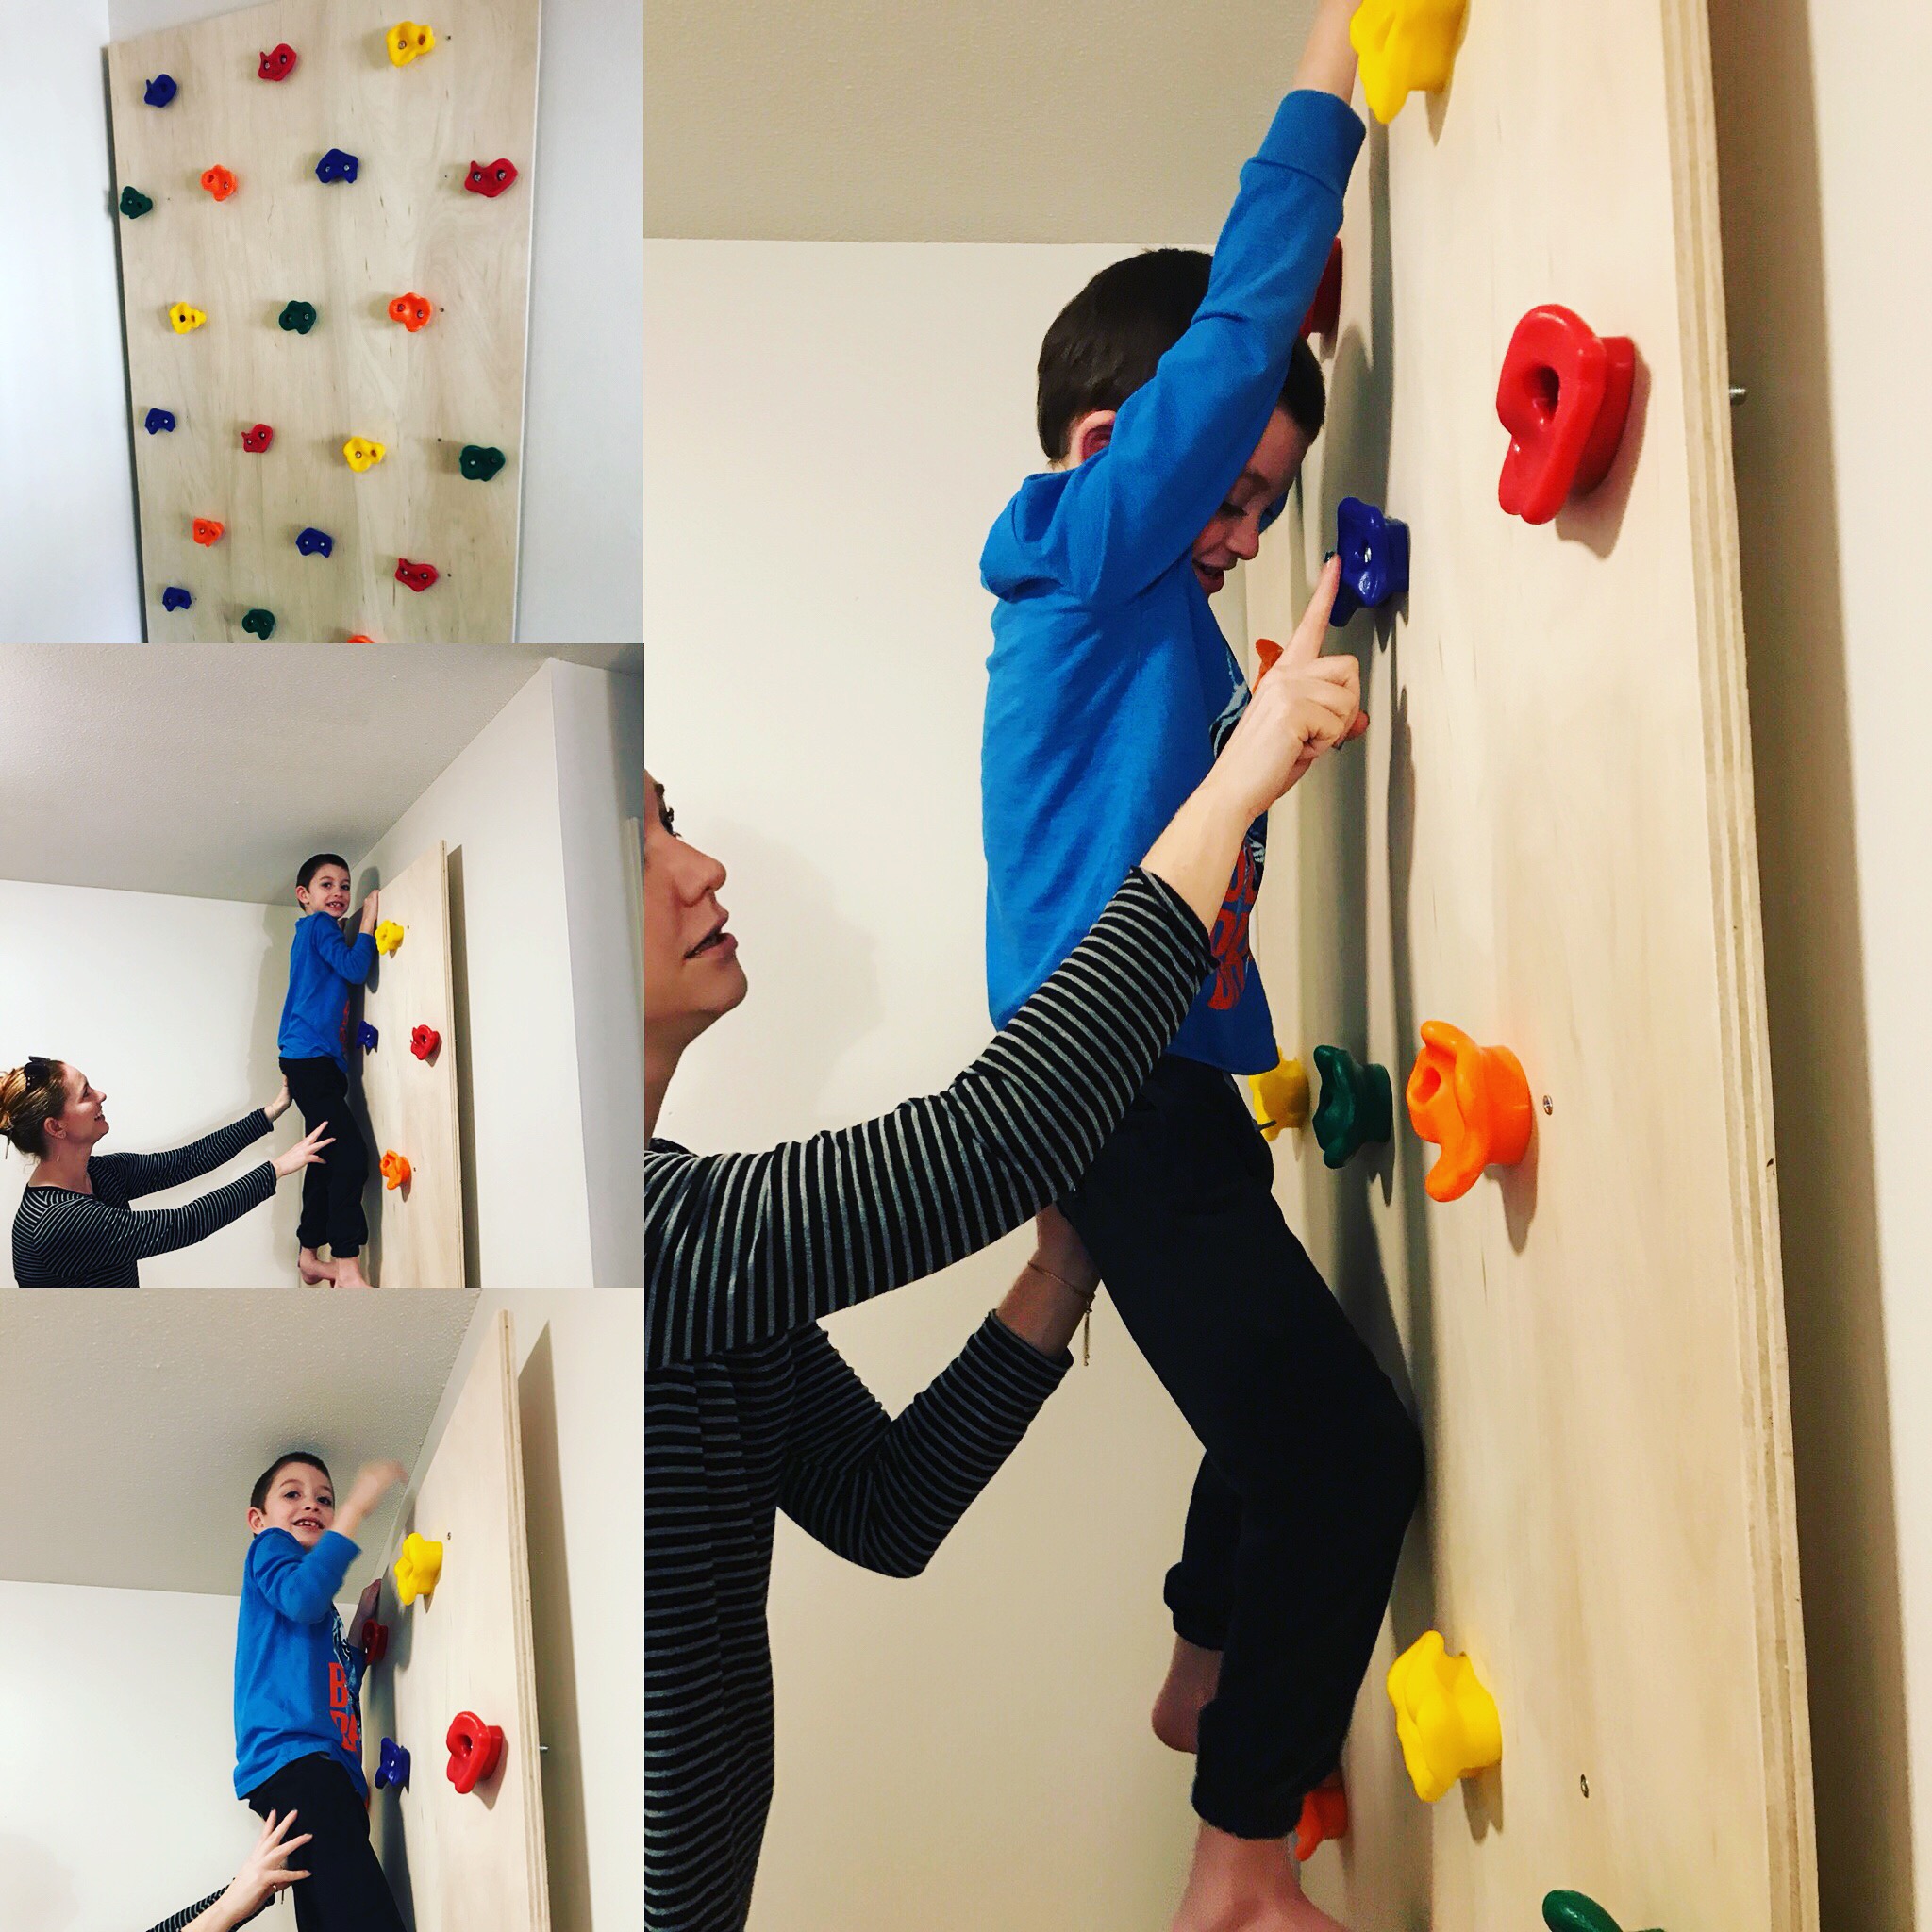
Materials: (<$130)
- 1 sheet of plywood (4’x8′)
- (2) 2×4’s
- 1 box of #8 x 1 5/8″ to 1 3/4″ inch long wood screws
- Sandpaper
- Rock Climbing Holds (which typically include the t-nuts, bolts, and washers) – I used Climbing Monkey Holds but I also like the Atomik Climbing Holds.
- (Optional) Primer and Textured Paint – I left mine bare plywood
Steps:
Step 1: Cut plywood to size. They come in 4’x8′ sheets, but the space would only fit up to 7′ tall. So I had them cut it. I also had them cut my (2) 2×4’s also to 7′ long. These will serve as my furring strips which the board is placed on which means less holes in the wall in case we move and more support for him as he gets bigger!
Step 2: Install the two furring strips on the wall first to plan where the holds should go. Also it adds support to the climbing wall and gives enough room for the bolts to poke through on the other side without tearing up your wall. I drilled mine directly into the studs in the wall using #8 x 1 5/8″ to 1 3/4″ inch long wood screws.

Step 3: So in an ideal world I would have used a chalk line to mark where to drill the holes. I would have spaced them 6-8″ apart. But because the holds I had bought required two t-nuts instead of one I actually eye-balled the placement instead.

Step 4: Drill the holes. Be sure to drill on the side that looks better because the back will get a bit torn up. Use a 7/16″ wood bit.

Step 5: Sand the plywood all over.
Step 6: Hammer a t-nut in each hole. This will be the back of your climbing wall and allow you to bolt the holds on. I recommend installing the wall onto the 2×4’s first and using a level.

Step 7: Install the wall and bolt on the holds!

Step 8 (optional): I left mine bare plywood but if I was to paint it I would drill, sand, prime, paint with texture, then put the rock climbing holds on.